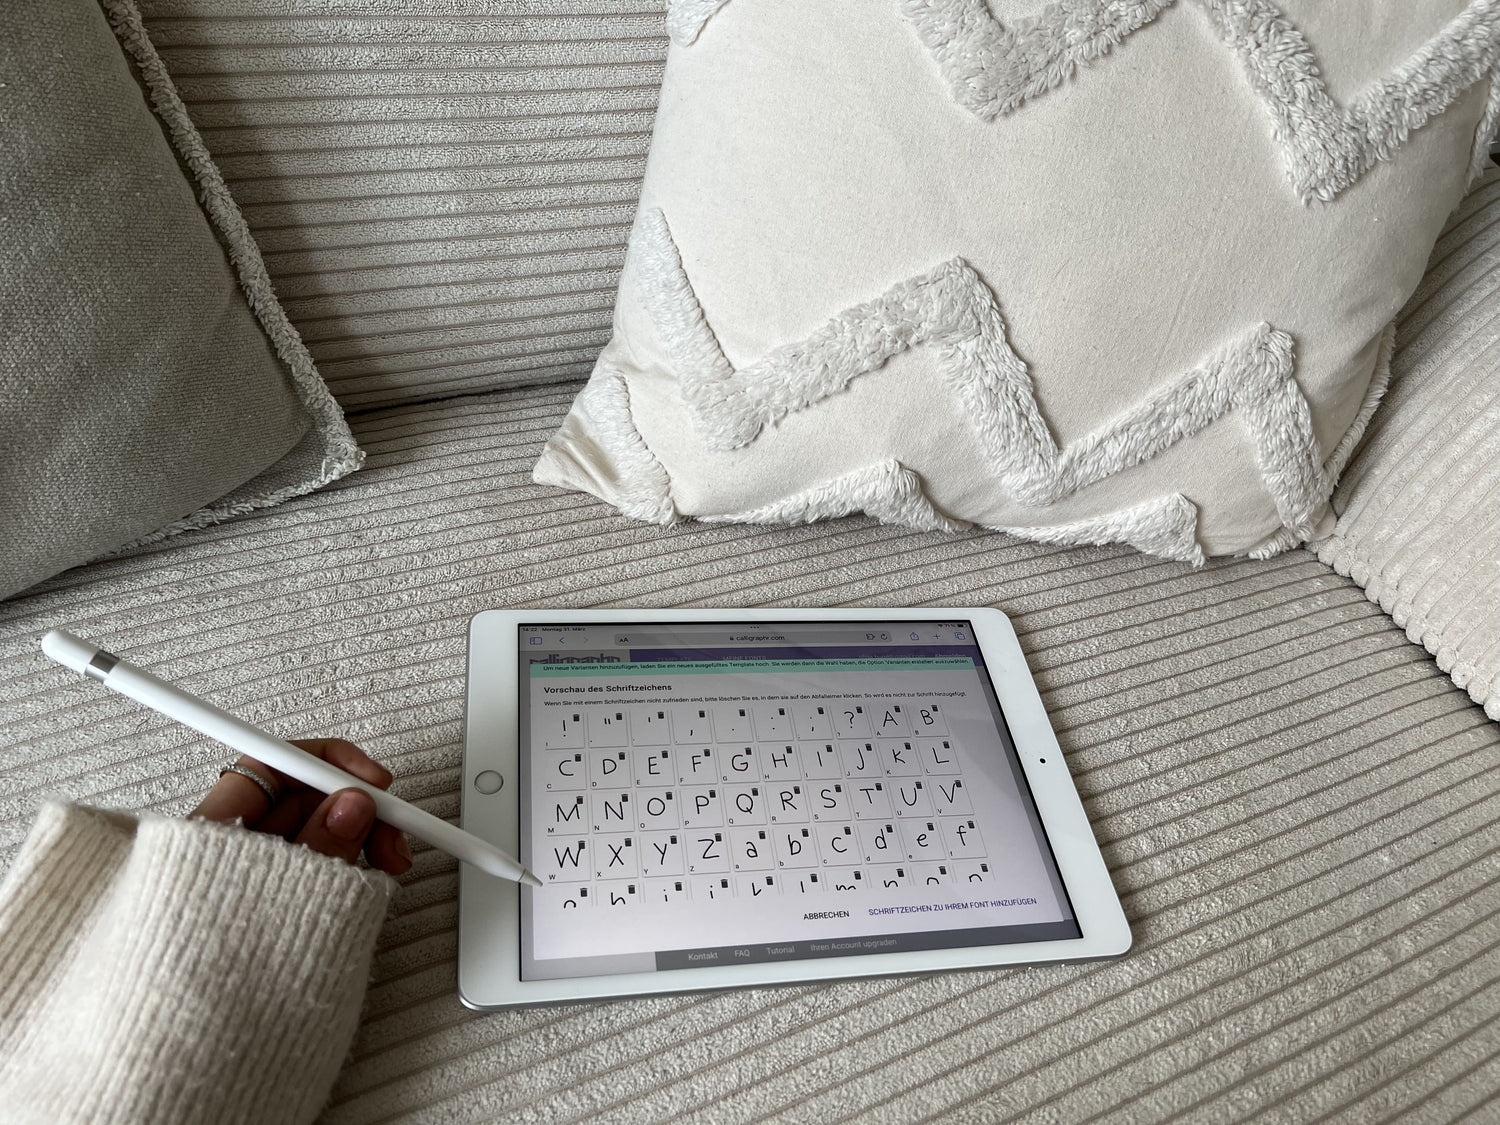
Imagine picking up your iPad, opening a note-taking app, and starting to type—but instead of a typical system font like Helvetica, your own handwriting appears on the screen. Sounds fascinating? 🤩 That's exactly what this post is about! We'll show you step by step how to digitize your own handwriting as a font on your iPad and then use it—for example, in Goodnotes!
From the idea to your own font: Preparation is everything
✍🏼 Before you start, you should have the following ready:
-
An iPad with the Goodnotes app (or alternatively ProCreate for advanced users)
-
An Apple Pencil or compatible stylus
-
A stable internet connection
-
An account at calligraphr.com
-
Optional: the iFont app to install your font
Note on Calligraphr
With the free version of Calligraphr , you can create up to 75 characters—enough for the entire alphabet, numbers, and some special characters. To get the most out of the free version, we recommend the following settings:
Minimal German + Minimal Numbers
This combination brings you to a total of 78 characters. That's just over the limit—but don't worry: You only need to remove three characters to create your own font for free. This is usually easy to do, as you rarely need all of the special characters.
If a character is missing from your font, Goodnotes automatically defaults to the default Helvetica font—which quickly ruins the handwritten look. If you want to avoid this, it's worth upgrading to the Pro version of Calligraphr: For €8 a month, you can add unlimited characters and create multiple fonts.
Our recommendation: Invest the €8 for one month and use this time intensively to create several individual fonts – this way you get the most out of the Pro period.
From pen to writing: How to turn your handwriting into a font
1. Create your template on Calligraphr
-
Opencalligraphr.com in the Safari browser on your iPad.
-
Log in to your account or, if you don't have one yet, sign up there.
-
Create a new project. For German fonts, select the "Minimal German" (Free) or "All Characters" (Pro) template.

-
Click on “Download template” .
-
Enter a file name and select PDF with characters as background .

-
Download the PDF.

2. Import template into Goodnotes
-
Open the PDF directly in the Safari browser.
-
Tap Share and select Goodnotes .

-
‼️ Important: Import as a new document.
Alternatively, you can edit the PDF file with other apps or programs. However, if you work extensively with Goodnotes, we recommend completing the document there as well.
💡 Pro tip: If you use ProCreate, you can open the template there and edit it with brush pens or calligraphy tools – for especially creative results!
3. Trace characters in Goodnotes
-
Now carefully trace each letter and character.

-
Use the zoom function for more precision.

-
Test different pen settings for best results.
4. Export & Upload to Calligraphr
-
Export the finished document as a PDF and save it locally.

-
Go back to Calligraphr > My Fonts > Upload Template .
-
Select the saved file and upload it.


-
Click “Create Font” , enter a name and download the font as an .otf file .


5. Install the font on your iPad with iFont
‼️ Note: We often get the question: "Is iFont really free?" 🤔 – and rightly so! When you first open the app, it seems as if there's only a paid version. The reason: The small "X" for closing the ad is hard to see, as its color is barely distinguishable from the background. If that doesn't bother you, you can easily use the app for free – including the most important basic functions for installing your own fonts. 🙌🏼
-
Open the file with your font in the iFont app.

-
Click Install > Allow > Close .
-
Open your iPad's settings .
-
You can find the new font under “Profile loaded” (or General > VPN & Device Management ) – install it.

💡 Additional tip: Watch our YouTube video where Anna explains step by step how to install your own fonts on your iPad!
Button “Go to video”
6. Use font in Goodnotes

-
Open Goodnotes.
-
Go into a text field and search for your own handwriting in the fonts.
-
If it doesn't appear, restart your iPad.
Conclusion: The path to your own font is easier than you think 👇🏼

With a little creativity and the right tools, your handwriting becomes something truly special: your own digital font. Whether for personal entries in your gratitude journal , quick entries in Gamechanger , or recording new recipes in your digital cookbook , you can give every page a truly personal touch with your own handwriting!
Here are all the steps at a glance:
-
Opencalligraphr.com in the Safari browser.
-
Create an account.
-
Import it into Goodnotes and trace the characters.
-
Export the finished PDF and save it.
-
Go to Calligraphr > Upload Template > Create Font .
-
Download the font as an .otf file .
-
Open iFont and install the font.
-
Follow the installation steps via the iPad settings.
-
Use your own font in Goodnotes .
If you don't want to use your own handwriting in Goodnotes (yet) or would like to try out other beautiful fonts - no problem! In this blog post, we'll show you how to easily use additional fonts in Goodnotes—including instructions for downloading and installing them, as well as 5 free fonts you can try right away! 🤩
To the blog post To the blog post
With beautiful fonts, you can instantly add more personality to your digital planning. So try out the free fonts now and give your notes that special something! 🙌🏼


4 comments
Vielen vielen Dank für die ausführliche Erklärung! Wirklich nur zu empfehlen, ohne Deine Hilfe wäre ich niemals auf den Weg gekommen oder hätte mich in den einzelnen Programmen zurechtgefunden…
———
Paperless Life:
Hallo Charlotte, freut uns zu hören, dass dir der Blog-Beitrag geholfen hat.
Geht das auch ohne die iFont-App?
———
Paperless Life:
Hallo Diana, das sollte kein Problem sein, wenn du die Datei für die Schriftart bereits besitzt. Gruß Robert
Hallo, ich finde deine Schriftart echt super, wo kann ich die denn runterladen. Habe den Link leider nicht gefunden.
Hey
Könntest du deine Schriftart verlinken? Möchte sie auch super gerne nutzen ❤️
———
Paperless Life:
Hi Natalie, sobald die Schriftart fertig ist, verlinke ich sie hier. Aktuell ist sie noch im Feintuning😎 Liebe Grüße, Anna