I have to honestly admit: For a long time, I didn't particularly like my own handwriting—especially on the iPad. While I enjoyed writing in Goodnotes, every time I looked at my notes, I felt dissatisfied. I thought I just didn't have a nice handwriting in Goodnotes, even though I actually like my handwriting on paper. Everything seemed scrawly, messy, and a far cry from the beautiful Goodnotes handwriting I had imagined.
Although I didn't like my handwriting, I found all the pen settings rather irritating, which is why I never thoroughly tested them. Then I thought to myself: What if I actually tried all the settings? Maybe that would ultimately make my handwriting look better in Goodnotes. No sooner said than done: I started working more intensively with Goodnotes, trying out different pens and writing techniques, and gradually discovered how helpful the many features can really be!
My conclusion: If you want to write beautifully in Goodnotes , you need one thing above all: some time and patience. The result: truly impressive...  Do you remember as a child experimenting with whether you preferred to hold the pen with two or three fingers? This playful testing is still worthwhile today – only digitally. In this blog post, I'll show you how to improve your digital handwriting in Goodnotes with a few simple tricks and the right tools. And the best part: Our free template helps you easily try out the right pen settings and find the style that really suits you.
Today I can say: I like my handwriting in Goodnotes—and it finally looks the way I imagined it from the beginning! 🙌🏼 So let's get started! 😎
1. Goodnotes settings that instantly improve your handwriting
Before I share my best tips for truly optimizing my handwriting in Goodnotes, let's start with the basics—the right settings. These have the greatest impact on how your handwriting ultimately looks. The best part: You can customize them to your individual writing style. 🙌🏼

👉🏼 If you want to find out which settings work best for you, be sure to try out our free test templates!
Download free templates Download free templates
The template lets you test different line widths, stabilization settings, and pressure sensitivity for each pen type—ballpoint, fountain, or brush pen. This way, you can quickly find out what feels good and what you write with most beautifully in Goodnotes.
Simply download, import into Goodnotes – and off you go!
Basics: Settings in Goodnotes explained
I'll now explain all the functions using the ballpoint pen as an example - the pen I personally use most often and which I can especially recommend to beginners in Goodnotes.
🔎 Tip in advance: Take advantage of digital planning – what wasn't possible on paper before is now easily done here. I use it daily when writing: First, I zoom in on the page, then I write, then I zoom out again. This may sound cumbersome, but it's not at all. Over time, it becomes routine and happens automatically. The fact is: Zooming in makes writing more beautiful!
1. Pen thickness (ballpoint pen, fountain pen, brush pen) 📏
With the ballpoint pen, you can adjust the line width to your liking – from very thin to bold. You can save up to three line widths and switch between them at any time with a click. This is super practical when you're writing, designing headlines, or sketching, for example. 
2. Pen stabilization (ballpoint pen, fountain pen, brush pen) 🧩
Pen stabilization helps you create a more consistent handwriting. Even the smallest tremors are automatically compensated for, making your lines appear smoother and more controlled. I use this feature almost all the time myself—it makes writing in Goodnotes much more relaxing. 
Especially if you tend to write quickly or restlessly (like I sometimes do 🙈), this setting can make a huge difference. Your handwriting immediately looks cleaner and more harmonious, without you having to type more slowly or concentrate more. Since even a small percentage helps here, I always set the stabilization to 10%.
3. Pressure sensitivity (fountain pen, brush pen) ✋🏼
In Goodnotes, you can adjust the pressure sensitivity of certain pens—like the fountain pen and the brush pen. This means that depending on how hard you press while writing or drawing, the line width changes automatically. This allows you to add more expression to your writing or sketches without having to constantly manually change the line width.
The ballpoint pen's pressure sensitivity is deactivated. This means that no matter how hard or lightly you press, the line always remains the same thickness. This makes the ballpoint pen ideal for those who prefer a smooth, clear line and don't want to concentrate on pressure while writing. 
4. Tip shape (fountain pen, brush pen) 🖌️
In the menu, you can choose the sharpness of the pen tip (e.g., rounder or squarer). This affects how "soft" or "precise" the pen feels. Try out what feels best for you in our free template! 
💡 Memory function: All settings are saved automatically so you can access them quickly at any time without having to adjust everything individually – a real time saver in everyday life!
2. Goodnotes pens at a glance

1. Ballpoint pen 
The ballpoint pen is perfect for beginners. It produces clear, even lines, regardless of how hard you press. Ideal if you're just starting out with digital writing or want the cleanest, quickest handwriting possible. Particularly practical: It forgives small irregularities in the writing flow and always looks neat. 
2. Fountain pen 
The fountain pen creates a slightly more sophisticated look—the lines appear softer and more elegant. A particularly practical feature is the "sharpness of the tip." You can adjust the pressure sensitivity so that the stroke varies depending on the pressure applied. Perfect for adding more expression to your handwriting.
👉🏼 Tip: With our free fountain pen template you can test exactly which pressure sensitivity and tip suits your handwriting best.
3. Brush pen 
The brush pen is practical for anyone who wants to work creatively. It responds strongly to pressure. You can draw lines from fine to broad and use it to create wonderful decorative headings. It's especially worth trying out the pressure sensitivity! 
This works best for me:
After extensively testing all the settings with the template , I landed on these favorites:
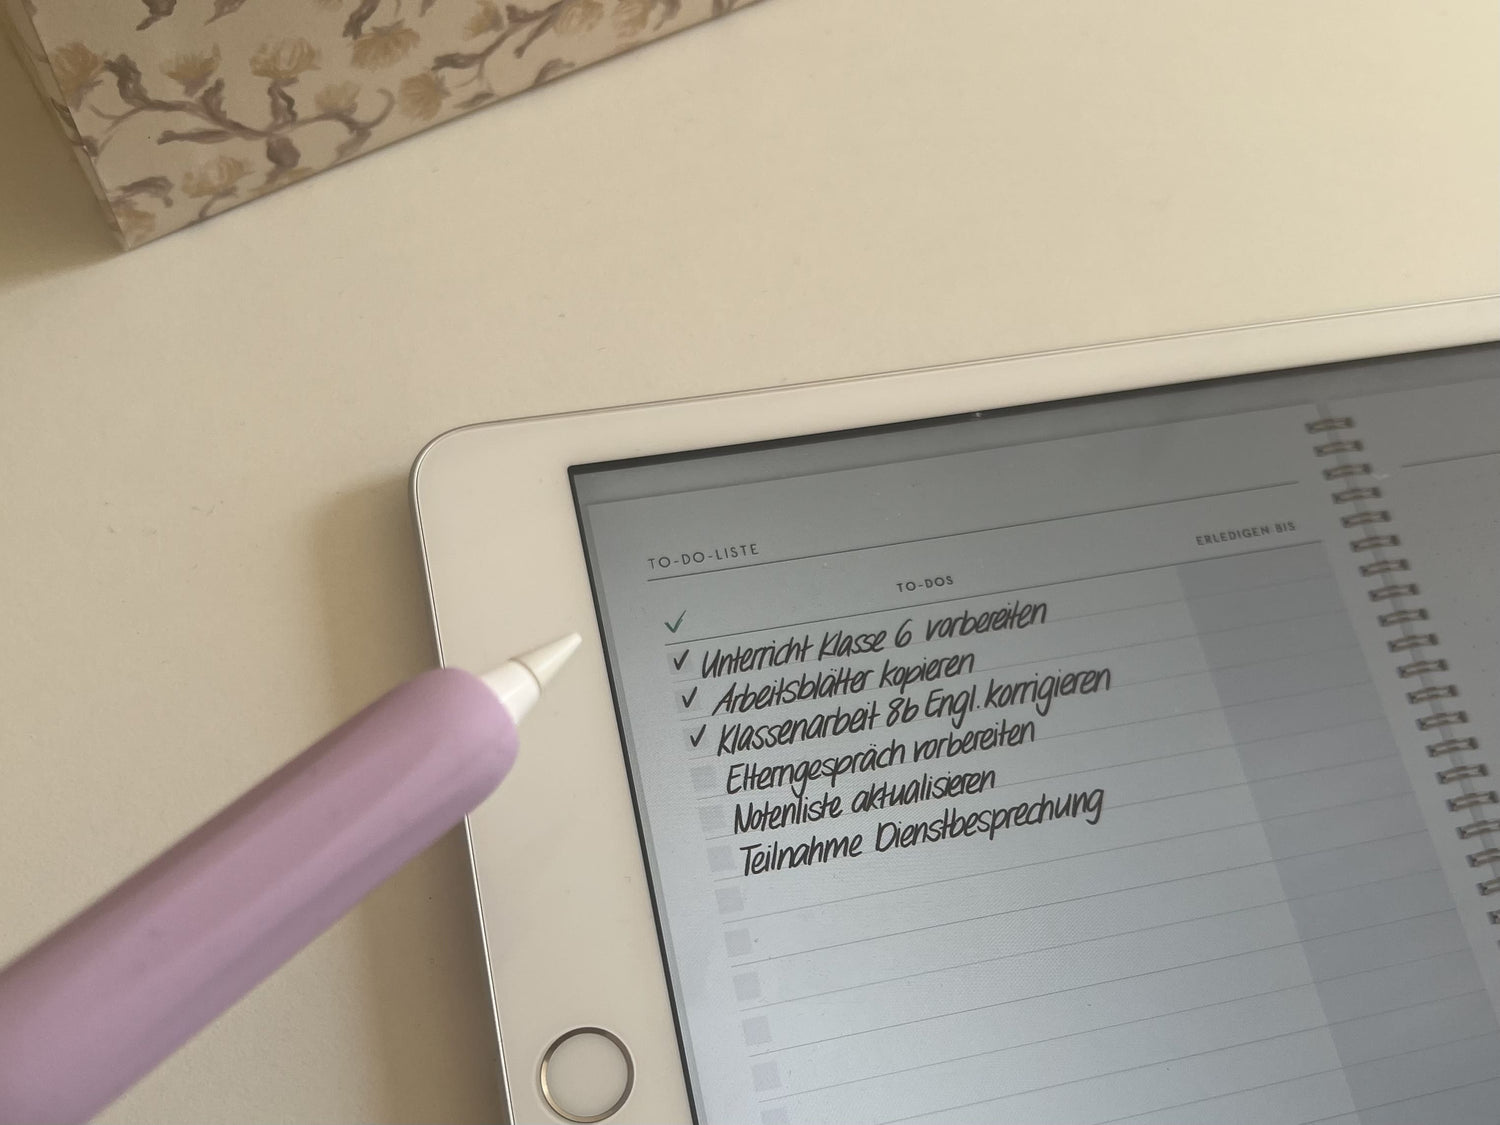
Ballpoint pen (thin line width): My go-to for everyday notes, for example, when entering to-dos in Gamechanger or for teachers who want to transfer lesson content to their weekly overview. I use these settings:
Line width: 1.00mm
Pen stabilization: 10%
Ballpoint pen (medium line width): Perfect for my digital recipe book entries—the font remains legible but appears a bit bolder.
Line width: 1.25mm
Pen stabilization: 10%
Fountain pen: I prefer to use this for creative headings and decorative elements – it gives my notes that certain something.
Line width: 1.25mm
Pen stabilization: 1%
Pressure sensitivity: 75%
Sharpness of the tip: 25%
4. It’s worth sticking with it – I promise!
Since optimizing my handwriting in Goodnotes, I've found digital planning much more enjoyable! Whether it's recipes in my digital cookbook, appointments in Gamechanger , or my daily journaling – my notes now not only look nicer, but also more structured and clear. And that also affects my motivation when planning and writing. 🙌🏼 
5. The answer to your question: “How do I improve my handwriting in Goodnotes?”
Here are all the tips for improving your handwriting in Goodnotes at a glance:
🔧 1. Adjust Goodnotes settings: Try different line thicknesses, play with pressure sensitivity, activate pen stabilization, and use the zoom function for more control while writing.
🖊️ 2. Choose the right pen type: Whether ballpoint, fountain, or brush pen—each pen type feels different. Find out which style best suits your handwriting.
📄 3. Use templates: With the free test templates you can easily try out all the settings, see everything at a glance and find your favorite.
If you stick with it and take the time to develop your handwriting step by step, you'll soon see: Even on the iPad, handwriting can be really beautiful—and, above all, really fulfilling.

And if you keep practicing, practicing, practicing, but are still not satisfied:
Check out this blog post – it also offers the option to convert your handwriting into typed text while you write (and there are also a lot of free handwriting-style fonts here 😉).